

Create or edit an API client
The API client form registers a partner application or changes an existing registration. A Super Admin enters a display name, the scopes, the redirect addresses and two switches. After the first save, comrce Hub shows the client secret once.
Open the form from API Keys. Use Create New Client for a new client, or Edit in a row for an existing one.
What you can do here
Section titled “What you can do here”- Name a new client. comrce Hub generates the client ID. You choose the display name customers see when they approve access. Fill in the create form.
- Decide what the application may request. Seven optional scopes, plus Identity, which is always on. Choose scopes · API clients and third-party sign-in.
- Allow machine access or silent sign-in. Two switches add the client credentials grant and sign-in without a visible page. Every control, explained.
- Tell comrce Hub where to send users. One or more redirect URIs, plus optional post-logout URIs. Fill in the create form.
- Hand over the client secret. It is shown once, right after saving. Copy the client secret.
- Change an existing client. Everything except the client ID and the secret can change. Edit a client.
The screen at a glance
Section titled “The screen at a glance”

What this screenshot shows
- Screen
- Create New SSO API Client
- Highlighted
- “Display Name”: names the client in the list and on the customer's consent screen
- Also visible
- Client ID: generated, read-only; Checkboxes unticked, scopes picker empty, one empty redirect URI row
- Purpose
- the create form as it opens
| Region | What it shows | What you do there |
|---|---|---|
| Heading | Create New SSO API Client or Edit SSO API Client | Orientation |
| Identity fields | Client ID (read-only) and Display Name | Name the client |
| Switches | Allow silent authentication and Allow client credentials flow | Allow silent sign-in or machine access |
| Scopes | Allowed scopes | Choose what may be requested |
| Addresses | Redirect URIs and Post-logout Redirect URIs (optional) | Enter the partner’s URLs |
| Bottom | Save | Create or update the client |
Fill in the create form
Section titled “Fill in the create form”- On API Keys, select Create New Client. The form opens with a generated client ID.
- Type the display name, for example Reporting export.
- Tick the switches the partner needs. Leave them off otherwise.
- Choose scopes in Allowed scopes.
- Enter the redirect URI, for example
https://reports.example.net/auth/callback. Add more rows with Add Redirect URI. - Select Save.


What this screenshot shows
- Screen
- Create New SSO API Client
- Highlighted
- “Save”: creates the client and shows its secret once
- Also visible
- Display name: Reporting export; Client credentials ticked, silent authentication unticked; Scopes: Organization, Write external events; Redirect URI 1: https://reports.example.net/auth/callback
- Purpose
- a filled create form ready to save
The button becomes active only when the form is valid and the scope list has loaded. An address without a scheme is refused right away:


What this screenshot shows
- Screen
- Create New SSO API Client
- Highlighted
- “Redirect URI must be valid.”: blocks saving until the address is corrected
- Also visible
- Value without scheme: reports.example.net/auth/callback; Save disabled
- Purpose
- the validation message for a redirect URI without a scheme
Choose scopes
Section titled “Choose scopes”Open Allowed scopes and select options. Each selected option shows a tick, and the field lists the labels. A search box at the top filters the options. Close the list with Esc or a click outside. Identity (openid) is always included and is not in the list.
Customers approve exactly the scopes you choose here, so pick only what the partner’s integration uses.


What this screenshot shows
- Screen
- Create New SSO API Client
- Highlighted
- “Write external events”: adds the comrce.external-events.write scope to the client
- Also visible
- 7 optional scopes, Organization selected; openid not listed; always included
- Purpose
- choosing the scopes a client may request
Copy the client secret
Section titled “Copy the client secret”After saving, the dialog Client Secret opens. Select Copy. The button briefly shows Copied!, and the message Secret copied! confirms. Then select Close. It closes the dialog and the create tab and refreshes the list. Closing the dialog any other way, with Esc or a click outside, also loses the secret.
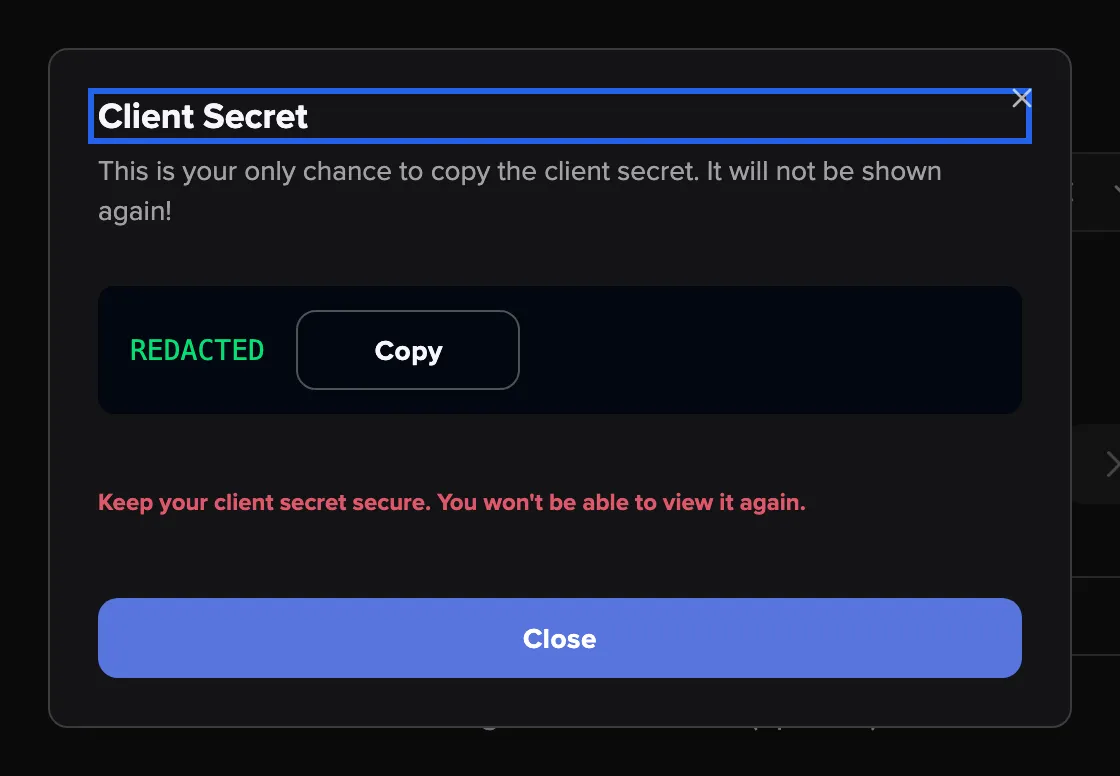

What this screenshot shows
- Screen
- Create New SSO API Client
- Highlighted
- “Client Secret”: shows the generated client secret once
- Also visible
- Secret box (placeholder REDACTED in sample data) with Copy button; Warning: "Keep your client secret secure. You won't be able to view it again."; Final button Close
- Purpose
- the one-time client secret
Edit a client
Section titled “Edit a client”Select Edit in a list row. The edit tab shows the current values and a red notice about removing scopes. Change what you need and select Save. The message Client updated! appears, the list refreshes and the tab closes. If the change is refused, Update failed! appears above the form and the tab stays open.


What this screenshot shows
- Screen
- Edit SSO API Client
- Highlighted
- “Disabling client credentials or removing scopes revokes all active user and machine sessions for this client.”: warns that reducing authority revokes the client's sessions and tokens
- Also visible
- Client: Nordwind ERP connector, silent authentication on; Scopes: Profile, Email, Stay signed in, Organization, Billing address
- Purpose
- the edit form with its revocation warning
Removing a scope, or unticking client credentials, ends every approval and token of the client in the same save. Adding scopes or changing the name and the URIs ends nothing.
Every control, explained
Section titled “Every control, explained”
Every control, explained
Section titled “Every control, explained”Allowed scopes
Section titled “Allowed scopes”The picker Allowed scopes with the placeholder Select optional scopes. Above it is the note Identity (openid) is always required.
Seven options:
- Profile
- Stay signed in
- Organization
- Billing address
- Tool permissions
- Write external events
The picker is disabled while the list loads. If loading fails, Could not load the available scopes. and Retry appear, and saving is blocked.
This list is what customers are asked to approve.
Allow client credentials flow
Section titled “Allow client credentials flow”Second checkbox, Allow client credentials flow, off by default.
On: the partner’s server gets tokens for the client itself, with the ID and secret alone. Unticking it on an existing client ends all of its sessions and tokens.
Services that run without a user, such as an export, need an identity of their own.
Allow silent authentication
Section titled “Allow silent authentication”First checkbox, Allow silent authentication, off by default.
On: the partner may sign users in without showing a page. This works only for users who approved this client before, for the same organization and scopes. Off: such requests fail.
Embedded dashboards need sign-in in the background. Everything else is safer with a visible step.
Post-logout Redirect URIs
Section titled “Post-logout Redirect URIs”The section Post-logout Redirect URIs (optional) with Add Post-logout Redirect URI.
Optional. Empty rows are ignored, and filled rows must be valid (Post logout URI must be valid.). In the edit form, an emptied list is not saved, and the old addresses remain. To change them, enter at least one new address.
Users who sign out through the partner land back on the partner’s page.
Redirect URIs
Section titled “Redirect URIs”The section Redirect URIs, with one field per address, a remove button beside each and Add Redirect URI.
At least one absolute URL. An invalid one shows Redirect URI must be valid., an empty one Redirect URI is required.. The last remaining row cannot be removed. The grey example text in an empty field is a placeholder, not a value.
comrce Hub returns sign-in results only to these addresses.
Client ID
Section titled “Client ID”First field, Client ID, greyed out.
Generated when the create form opens and never editable. In the rare case that the ID already exists, saving shows Client with this Id already exists.
A random ID cannot be guessed and never clashes with an existing client.
Other controls on this page
| Control | What it does | Why |
|---|---|---|
| Display Name | Required plain text. Empty shows Display name is required.. The name appears in the list and when customers approve access. | Customers approve access by a name they recognise. |
| Save | Creates the client and opens the secret dialog, or saves the edit and closes the tab. It stays disabled while the form is invalid or unchanged, and while the scopes are loading or failed to load. | An incomplete client would leave the partner unable to sign anyone in. |
Who sees what
Section titled “Who sees what”
Who sees what
Section titled “Who sees what”| Part | Who sees it |
|---|---|
| Both form tabs | Super Admin only |
| The notice Disabling client credentials or removing scopes revokes all active user and machine sessions for this client. | Edit tab only |
| The secret dialog | Only right after creating, once |
What you need to know
Section titled “What you need to know”
What you need to know
Section titled “What you need to know”| Topic | Fact |
|---|---|
| Defaults | Both switches off, Identity only, one empty redirect row, one empty post-logout row. |
| Secret | 43 characters, never in the edit form, no renewal. |
| Leaving with changes | Closing the tab with unsaved changes asks for confirmation first. |
| Edit loading | The edit tab loads the client by its ID. Open it from the list row. |
Frequently asked questions
Section titled “Frequently asked questions”
Frequently asked questions
Section titled “Frequently asked questions”Create
Section titled “Create”Why can’t I type into the Client ID field?
Section titled “Why can’t I type into the Client ID field?”comrce Hub generates the client ID when the create form opens. Client ID stays read-only in the create and the edit form. Give the partner that generated ID together with the secret from the dialog.
Why does the form say Identity (openid) is always required?
Section titled “Why does the form say Identity (openid) is always required?”Every API client needs the Identity scope, so that comrce Hub can tell the partner who signed in. It is added automatically and does not appear in the Allowed scopes picker. Choose only the optional scopes.
What happens if I close the secret dialog by accident?
Section titled “What happens if I close the secret dialog by accident?”The client exists, but its secret cannot be shown again. Delete the client under API Keys and create a new one. Copy the new secret with Copy before you close the dialog.
What does Close in the secret dialog do?
Section titled “What does Close in the secret dialog do?”Close closes the dialog Client Secret and the create tab. It also refreshes the API client list, so the new client appears there. The secret is gone afterwards, so copy it with Copy first.
Can I change the secret of an existing client?
Section titled “Can I change the secret of an existing client?”No. The edit form shows no secret and has no renewal button. Create a second client with the same settings and let the partner switch to the new ID and secret. Delete the old client afterwards.
Will saving the edit form sign customers out?
Section titled “Will saving the edit form sign customers out?”Only if you removed a scope or unticked Allow client credentials flow. In that case comrce Hub ends every approval and token of the client. Customers approve again at their next sign-in. Other changes sign nobody out.
Why are deleted post-logout URIs back after saving?
Section titled “Why are deleted post-logout URIs back after saving?”The edit form does not save an empty Post-logout Redirect URIs (optional) list. The previous addresses stay on the client. Enter at least one new post-logout address in the edit form to replace the old ones.
Validation
Section titled “Validation”Why is Save still disabled?
Section titled “Why is Save still disabled?”Save needs a display name and at least one valid redirect URI. The scope list must have loaded, and something must have changed. Look for red messages under the fields. Also look for Could not load the available scopes. under the scope picker.
Troubleshooting
Section titled “Troubleshooting”
Troubleshooting
Section titled “Troubleshooting”| Symptom | What to check |
|---|---|
| Redirect URI must be valid. | Add the scheme: https://…. |
| Could not load the available scopes. | Select Retry. Reload the console if it persists. |
| Client with this Id already exists | Close the create tab and open it again from the list to get a new ID. |
| Update failed! above the edit form | Correct the fields with red messages and save again. |
| Could not load the API client. fills the edit tab | The client could not be loaded. A teammate may have deleted it, or the connection failed. Close the tab and open the client again from the list. |
| The secret dialog closed before copying | Delete the client and create a new one. |